About Conditional Field -
A conditional RQ field is a field with a condition. This means the conditional fields will be shown in your RQ form when certain conditions are matched for a field that has been defined by you in the app.
Normal fields are normal fields with no conditions. They will be shown in your RQ form at the start.
Below is an example of a Conditional Field in the RQ Form.

How to enable a Conditional Field -
You need to follow some simple steps. First Go to the App menu -> Settings -> Quote Button Settings tab -> Request Quote Form Fields settings

There you can add new fields for your Request Quote Form.
After entering the field's basic details(i.e. Name, Type, Value Length), select the "Use Field as" as Conditional.
By default, it is set as a normal field. Currently, we are creating a conditional field that's why we will set it as a conditional field.

Actually, till now, we have entered the conditional field's basic details.
Now we need to enter the condition for this field about when this field is to be shown in the RQ form.
Click the "Set Condition" Button to set the condition for this field.
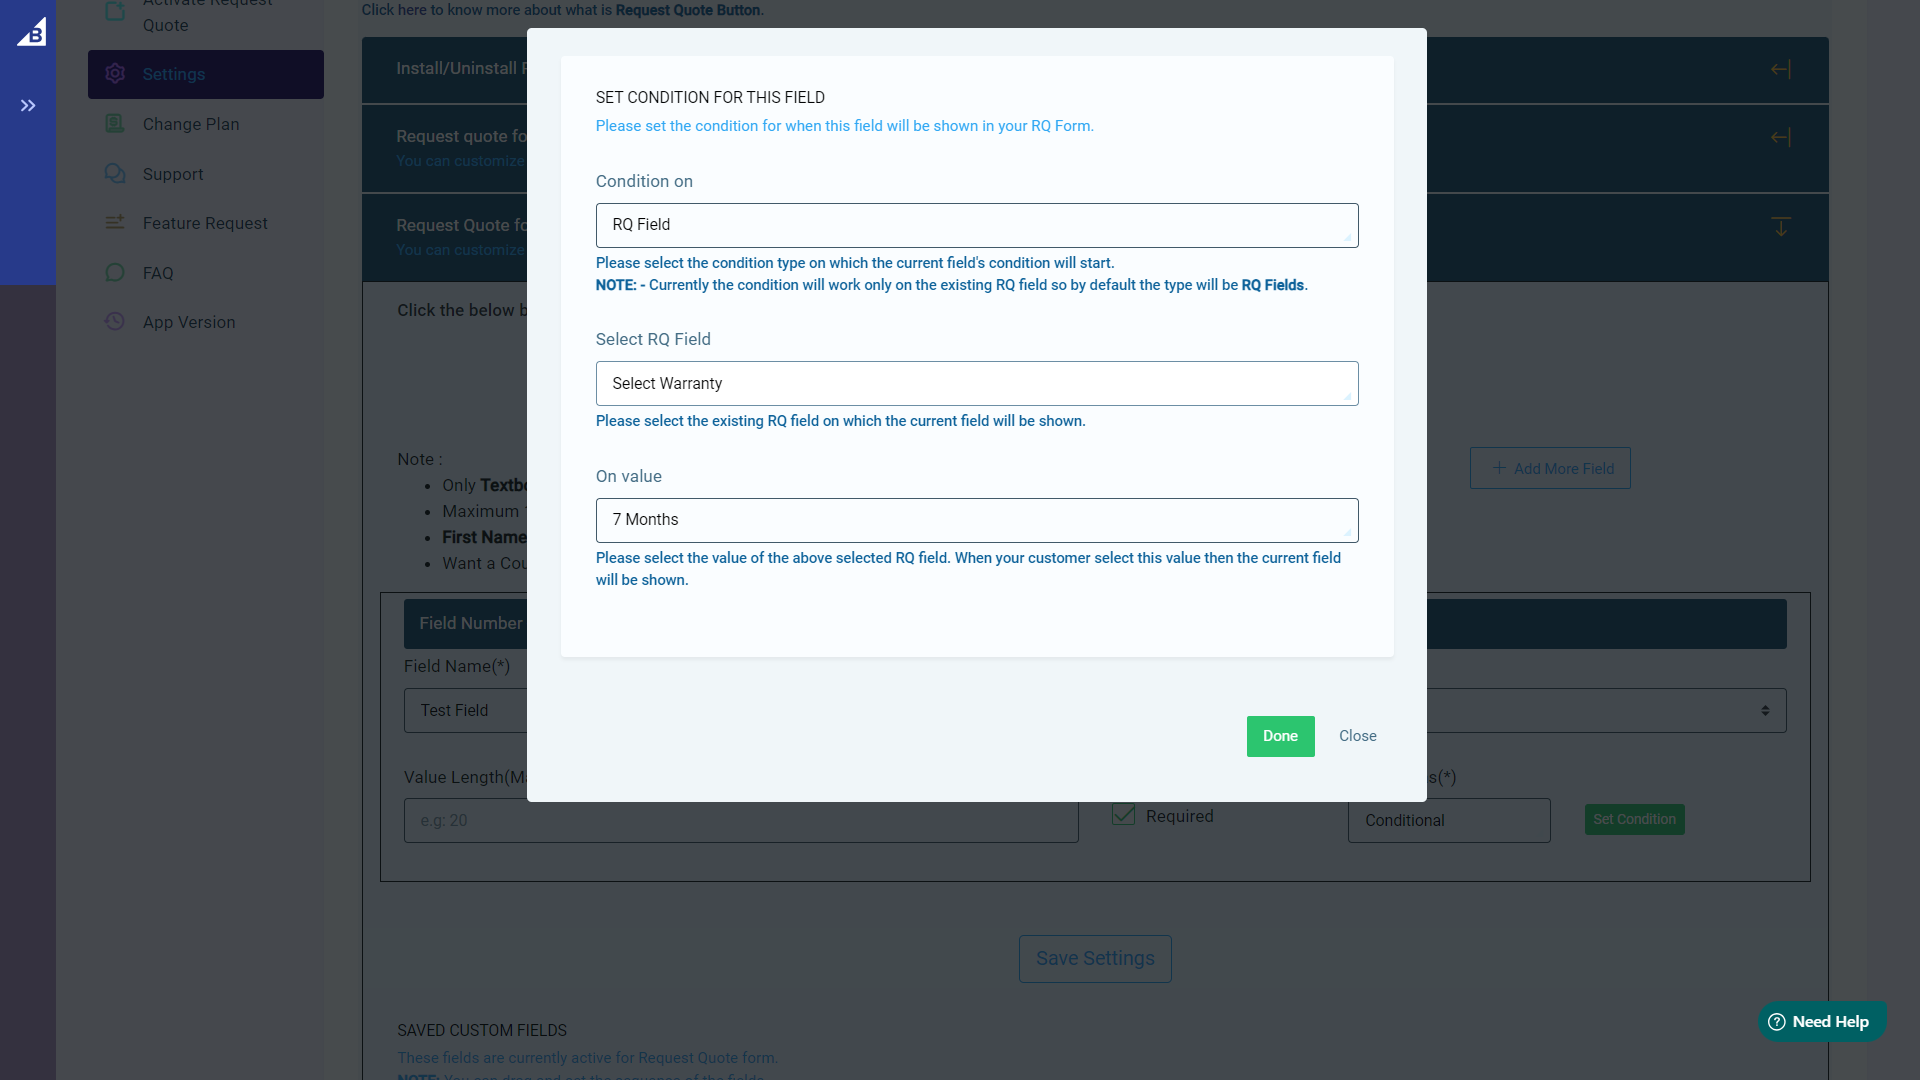
After clicking the button, you will see the below screen.

You can see three fields there.
- Condition On
- Select RQ Field
- On Value
The above fields are used as follows -
1. Condition On: -
This field is used for condition event start. Like condition event will trigger on RQ Field or Cart Amount or Customer Type.
Currently, the condition will only work on the existing Request Quote Field so you can see only the RQ Field option.
We will add other condition events in Future Releases.
2. Select RQ Field:-
As we have selected the Condition On event on the RQ field, we need to select any existing RQ field.
3. On Value:
Select any value of the above selected field, on which the current conditional button will be shown.
That's it. Click done and save this field.
Example of a Conditional Field -
Let's assume -
We have already set a Normal field called "Extended warranty?" before which is a Radio type field and has two values (Yes, No).
Now we want to add a conditional field called (Select warranty year) and it will be a select option field and the values of this field will be 1 Year, 2 Year, 3 Year, and 5 Year.
We want the Select Warranty Year field to be hidden by default from the RQ form and when a customer selects the Extended Warranty to Yes then show the Select Warranty Year field.
For this condition,
We need to set the below condition.
1. We need to add a normal field first (If not any for the condition) with its basic details.
i.e. Field Name - Extended Warranty? Type - Radio Button, Values- Yes, No. Required - checked, Use field as - Normal
Then save this field. This field is a normal field and it will be shown every time.
2. Now we will set a conditional field as -
i.e. Field Name - Select warranty year. Type - Select Option, Values - 1 Year, 2 Year, 3 Year, 5 Year, Required - Checked. Use field as - Conditional.
After adding the basic details, we need to set the conditions.
3. On the Condition set popup, the values will be as follows -
Condition On - RQ Fields, Select RQ Field - Extended Warranty, On Value - Yes
See, we have set the RQ Field(Extended Warranty) and its value(Yes) on which the current field (Select Warranty Year) will be shown.
If you still need any help to setup a conditional field then please create a ticket on our support portal or mail us at support@skylitech.com


Was this article helpful?
That’s Great!
Thank you for your feedback
Sorry! We couldn't be helpful
Thank you for your feedback
Feedback sent
We appreciate your effort and will try to fix the article